Displaying WMS Layers |
Learn more about Verizon Connect GeoBase.
Get information about the latest release
This tutorial will demonstrate how to display a Web Map Service (WMS) layer in a simple GeoStream map application.
The Web Map Service (WMS) is a standard that defines a simple HTTP interface for requesting data-centric map images, such as cloud cover, precipitation, wind speed etc. The interface also permits the transparency level of the returned image to be set allowing the image to be combined neatly with the GeoStream map control.
To add WMS layers to your GeoStream application, use the Telogis.GeoBase.MapLayers.TileLayer class in conjunction with the server-side layers.config file, which is supplied with your GeoBase API installation.
For more information on WMS, see the Open Geospatial Consortium site.
In this tutorial, we'll create a simple application to display a WMS layer. For a more comprehensive example, where different layers can be chosen with a combo box, see the Further Reading section below.
This tutorial uses WMS tiles provided by NOAA/NOS nowCOAST. |
To begin with, create a new text file, and save it to your Scripts folder in your GeoStream server as wmsLayers.aspx. Add the following code, which has been copied from the tutorial Creating a Simple Map.
<%@ Page Language="C#" Src="AuthenticatedPage.aspx.cs" Inherits="AuthenticatedPage" %>
<!DOCTYPE html PUBLIC "-//W3C//DTD XHTML 1.0 Strict//EN" "http://www.w3.org/TR/xhtml1/DTD/xhtml1-strict.dtd">

<html xmlns="http://www.w3.org/1999/xhtml">
  <head>
    <title>WMS Tile Layer</title>

    <script type="text/javascript" src="<% GetAPISource (); %>"></script>
    <script type="text/javascript">

      var GeoBase = Telogis.GeoBase;
      var Map = Telogis.GeoBase.Widgets.Map;
      var Size = Telogis.GeoBase.Size;


      var main = function () {

        // The call to set the internal GeoBase authentication token should be made at the start of the entry
        // function, as it is a prerequisite for any requests made to the server.
        GeoBase.setService (<% GetService (); %>);
        GeoBase.setAuthToken (<% GetToken (); %>);

        // By default, a newly created map object has its DOM tree appended to the document body.
        // To customize where the map is located, either create in the HTML section a div with the same
        // ID, or specify a "parent" configuration option.
        var map = new Map ({
          id:   "main_map",
          size:  new Size (640, 480)
        });
      };

    </script>
  </head>

  <body onload="main ();">
  </body>

</html>
The code above creates a new 640 x 480px Map object as discussed in the Creating a Simple Map tutorial. Load the page in a browser to test the code.
Next we'll add the WMS layer. To do this, we'll create a TileLayer object. Add the following code inside the second set of <script> tags.
var TileLayer = Telogis.GeoBase.MapLayers.TileLayer;Place the following code after the map object. Here, we specify the layer that we want to add ('Wind' in this case), and the expiry time (in seconds) for when the layer is to be refreshed ('expirySecs').
var tileLayer = new TileLayer({
                id: 'auxiliary',
                map: map,
                tileConfig: {args: {layer: 'Wind'}},
                expirySecs: 300
});
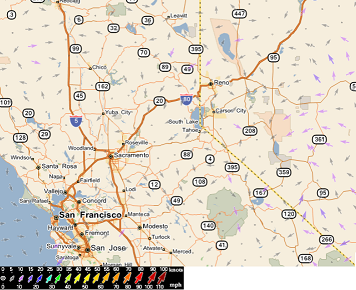
Save your file, and open it in a browser. You will be presented with a GeoStream map object, followed shortly by the 'Wind' layer, as shown in the image below.

Legends are available for the WMS layers that are supplied by NOAA/NOS nowCOAST. To add a legend to your page, add a <DIV> tag to the <BODY> section, and add an image tag inside the <DIV>. Then point the image's source at the legend's URL (LegendUrl) which is defined in the layers.config file.
As an example, consider the code below which adds a legend to the page for the Wind WMS layer.
<body onload="main ();">
  <div id="main_map" style="width: 640px; height: 480px;"></div>
  <div><img src="http://nowcoast.noaa.gov/LayerInfo?layer=RTMA_PTWINDVECT_01&data=legend"/></div>
</body>
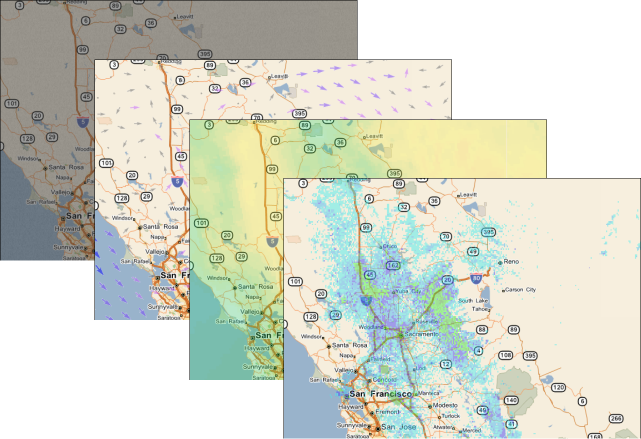
To change the WMS layer displayed, modify the 'Wind' argument to one of those described in the layers.config file, such as 'Cloud', 'Radar', or 'Temperature'; the image below displays these types.
If you want to combine layers, then add more TileLayers to the map. For example, the code below will combine your map and 'Wind' layer with a 'Radar' layer. Place the following code after the 'Wind' TileLayer object.
var tileLayer2 = new TileLayer({
                id: 'auxiliary2',
                map: map,
                tileConfig: {args: {layer: 'Radar'}},
                expirySecs: 300
});
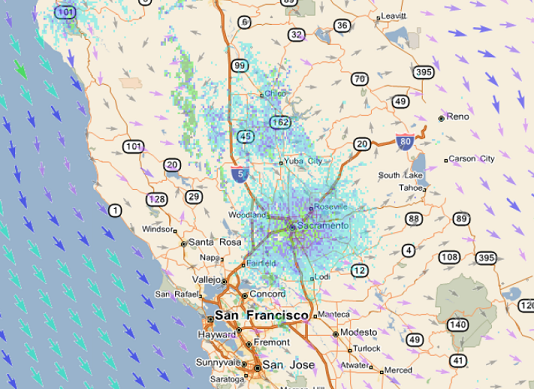
The image above shows the 'Wind' and 'Radar' layers combined. The complete code is detailed below.
<%@ Page Language="C#" Src="AuthenticatedPage.aspx.cs" Inherits="AuthenticatedPage" %>
<!DOCTYPE html PUBLIC "-//W3C//DTD XHTML 1.0 Strict//EN" "http://www.w3.org/TR/xhtml1/DTD/xhtml1-strict.dtd">

<html xmlns="http://www.w3.org/1999/xhtml">
  <head>
    <title>WMS Tile Layer Demo</title>

    <script type="text/javascript" src="<% GetAPISource (); %>"></script>
    <script type="text/javascript">

      var GeoBase = Telogis.GeoBase;
      var Map = Telogis.GeoBase.Widgets.Map;
      var Size    = Telogis.GeoBase.Size;
      var TileLayer = Telogis.GeoBase.MapLayers.TileLayer;


      var main = function () {

        // The call to set the internal GeoBase authentication token should be made at the start of the entry
        // function, as it is a prerequisite for any requests made to the server.
        GeoBase.setService (<% GetService (); %>);
        GeoBase.setAuthToken (<% GetToken (); %>);

        // By default, a newly created map object has its DOM tree appended to the document body.
        // To customize where the map is located, either create in the HTML section a div with the same
        // ID, or specify a "parent" configuration option.
        var map = new Map ({
          id:   "main_map",
          size:  new Size (640, 480)
        });

        var tileLayer = new TileLayer({
              id: 'auxiliary',
              map: map,
              tileConfig: {args: {layer: 'Wind'}},
              expirySecs: 300
        });

        var tileLayer2 = new TileLayer({
              id: 'auxiliary2',
              map: map,
              tileConfig: {args: {layer: 'Radar'}},
              expirySecs: 300
        });
      };

    </script>
  </head>

  <body onload="main ();">
  </body>

</html>
With the method shown above, the layers are served one at a time as separate tiles. For a more efficient approach, the layers can be served at the same time as one tile, by adding multiple layer's names to a TileLayer object's arguments list.
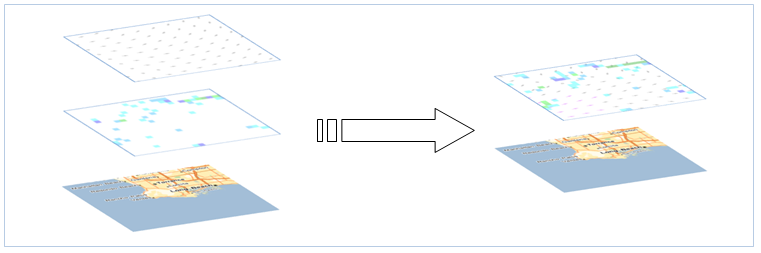
As an example, to combine 'Wind' and 'Radar' together on one TileLayer, append 'Radar', separated by a comma, to the args, as shown below.
var tileLayer = new TileLayer({
            id: 'auxiliary',
            map: map,
            tileConfig: {args: {layer: 'Wind,Radar'}},
            expirySecs: 300
});
The arguments are separated by a comma, are case-sensitive, and do not include any spaces. |
WMS satellite imagery, which will appear below the roads, can be added to your GeoStream map application by adding a Satellite argument to the tileConfig as shown in the code below:
var tileLayer = new TileLayer({
               id: 'auxiliary',
               map: map,
               tileConfig: {args: {satellite: 'myWMSSatelliteProvider'}},
               expirySecs: 300
});
myWMSSatelliteProvider is the name of the layer as described in layers.config. |
For a more comprehensive example, where different layers can be chosen with a combo box, see the source code for tutorial.weatherdata.aspx, which can be found in the Scripts folder on your GeoStream server.
For more information on WMS, please see the Open Geospatial Consortium site.